Preorder/Backorder usage Instructions
Welcome to our preorder backorder usage instructions. This
page will provide you with the information needed to use this mod.
Step 1: Preparing a product Here we will be setting up a product for preorder/backorder. Any product may be added to preorder/backorder, however products will not be displayed as backordered until the quantity in stock is reduced to 0. This is useful for allowing an item to be immediately set to backorder when your stock runs out. The preorder status requires a number in stock. This number represents the number of items you have preordered from your supplier and expect to receive.
- Click the Preorder/Backorder link in the administration menu.
- Chose the category of the item(s) you wish to prepare for preorder/backorder from the dropdown.
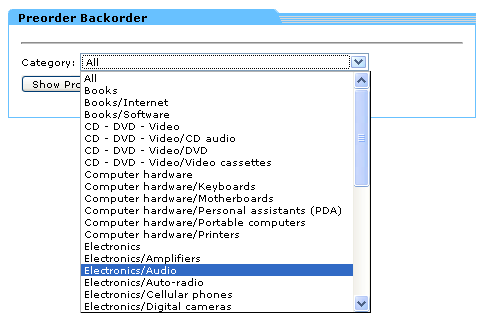
- Click the Show Products Button.
- Select the product(s) you wish to set preorder/backorder from the products select box.
Note: You may select multiple products by holding control while clicking the desired products.
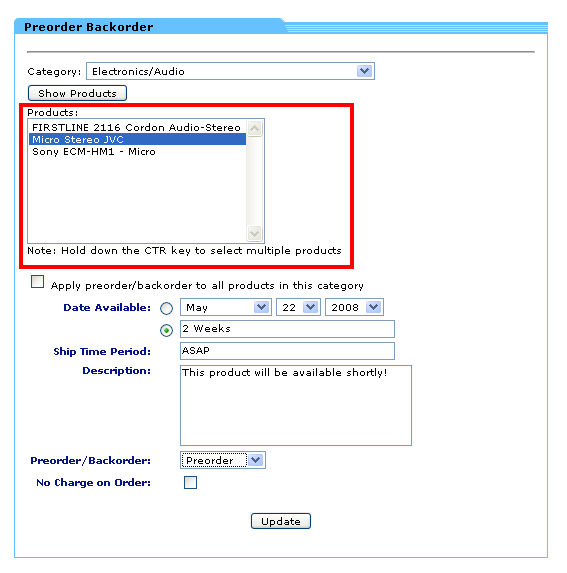
- If you wish to apply preorder/backorder to all the products in a category you can opt to check the apply preorder/backorder to all products in this category checkbox instead of control-clicking each individual item.
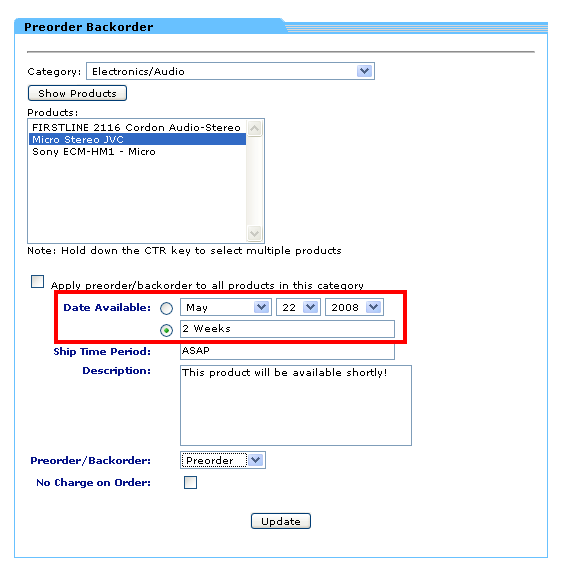
- Next select the date you expect your item to be in stock/back in stock.
Note: You may either select a date from the date drop downs or enter text in the box below (e.g. Two Weeks). You may chose which you wish to use via the radio buttons to the left of the date dropdown and the text box.
- Ship Time Period is optional but you may chose to enter something like ASAP or 1 week from availability in this box
- Description is also optional.
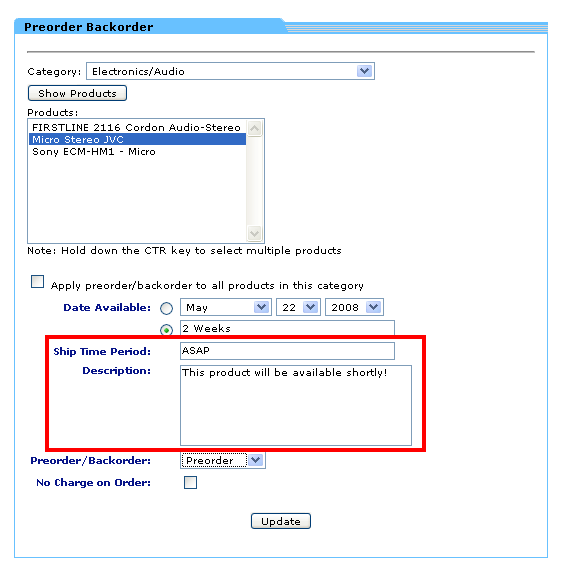
- Next chose whether this item is on Preorder (yet to be in stock) or Backorder (item was once was in stock but you are currently out)
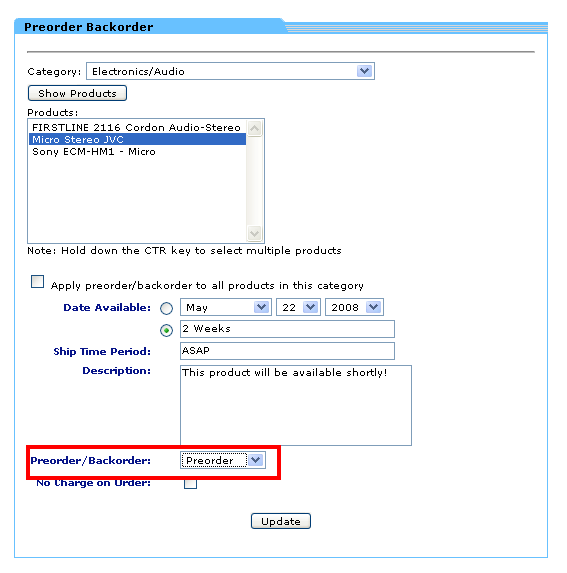
- The No Charge on Order checkbox is used when you are not allowed to charge for pre-ordered items. Checking this will allow a person to add an item to their cart and not bill them for the item. In this case we recommend when the item arrives in stock you either email or call the customer before billing them and shipping the item.
- Finally, Click update and you now have an item or items set up for preorder backorder.
Step 2a: Checking the the customer side
If you have been following this guide you should have one or more items set up as preorder/backorder. Here we will navigate to those items so you can get an idea of what this mod provides on the customer side.
- Log in as a customer.
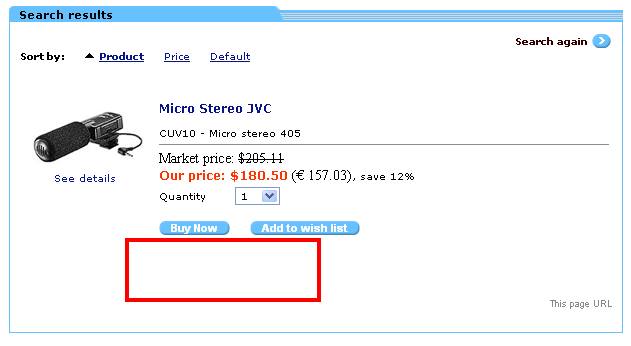
- Navigate to the item you have set up as preorder backorder.
- If you have any of the item in stock the item should look unchanged.
- Log in to admin.
- Click modify product.
- Find your preorder/backorder item and set the quantity in stock to 0.
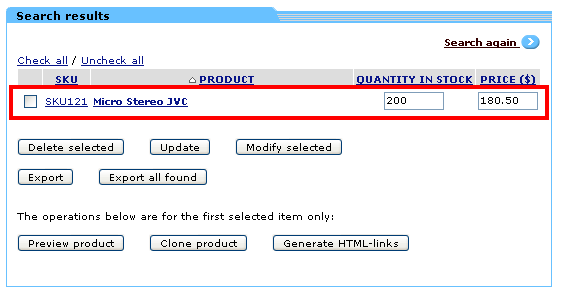
- Now log back in to your customer side and navigate to your item.
- You should see Available For Preorder(or Backorder) Due in Stock: (some_date).
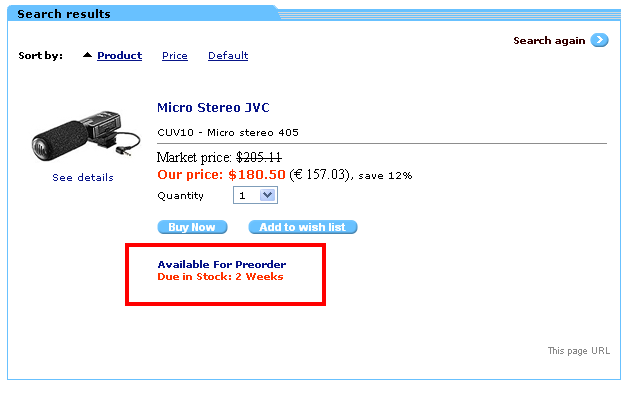
- Now click on the word Preorder (or Backorder).
- A pop-up window should appear with all the information we just entered for that item.
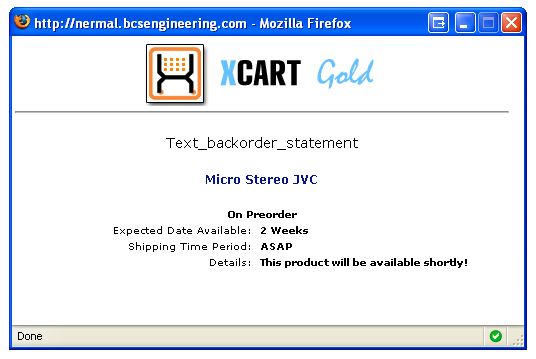
- You may notice at the top Text_backorder_statement this is a language variable and can be customized (we will cover this).
- Should you chose to add this item to your cart it will show up as preorder/backorder both there and on your invoice.
Step 2b: Changing your language variable
- Log into admin.
- Click Languages from the Administration Menu
- Under Edit Language from the language dropdown chose your language (e.g. English).
- You shoud see and Apply Filter text box, enter txt_backorder_statement and click go
- You should see the txt_backorder_statement language variable and a large text box. You can enter anything you would like here.
For example: “This product will be available shortly.”
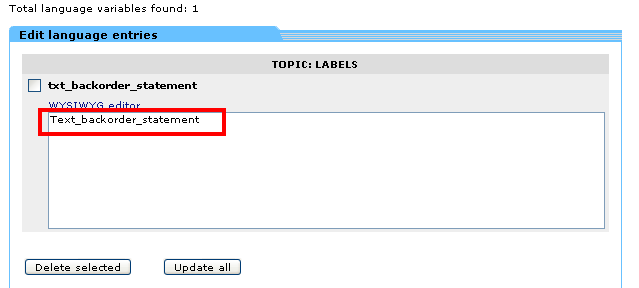
- Click update all.
- Follow the 2a instructions to see your updated language variable.
Step 3: Removing an item from Preorder/Backorder (or resetting the date)
Once you have set an item to preorder/backorder it will remain there until unset. This is important to remember as if for some reason an item goes out of stock and you have not reset/unset it, it will show previous dates and remain available for preorder/backorder.
- Click the Preorder/Backorder link in the administration menu.
- Chose the category of the item(s) you wish to modify from the dropdown.
- Click the Show Products Button.
- Select the product(s) you wish to modify from the products select box.
Note: You may select multiple products by holding control while clicking the desired products.
- If you wish to modify all the products in a category you can opt to check the apply preorder/backorder to all products in this category checkbox instead of control-clicking each individual item.
- From here you can either change the date and keep the prodocts on preorder/backorder or you can select none from the preorder/backorder dropdown and remove them making them unavailable should they run out of stock
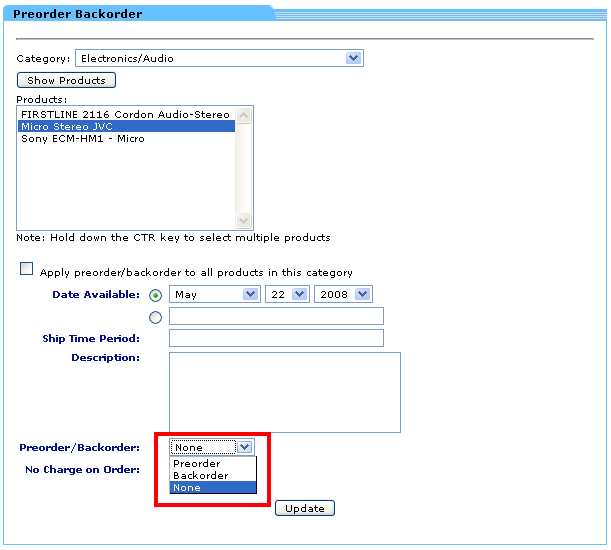
- Click the Update button.
