Employee Link Control Usage Documentation
Step 1: Creating fulfillment staff
If you already have fulfillment staff feel free to skip this step. Fulfillment staff have administrator access to orders and tracking.
Our goal is to add some additional administrator access to these employees. Here are the steps for creating a fulfillment account.
- Log into X-cart as an administrator.
- In the management menu click the users link.
- Now click the Create administrator profile.
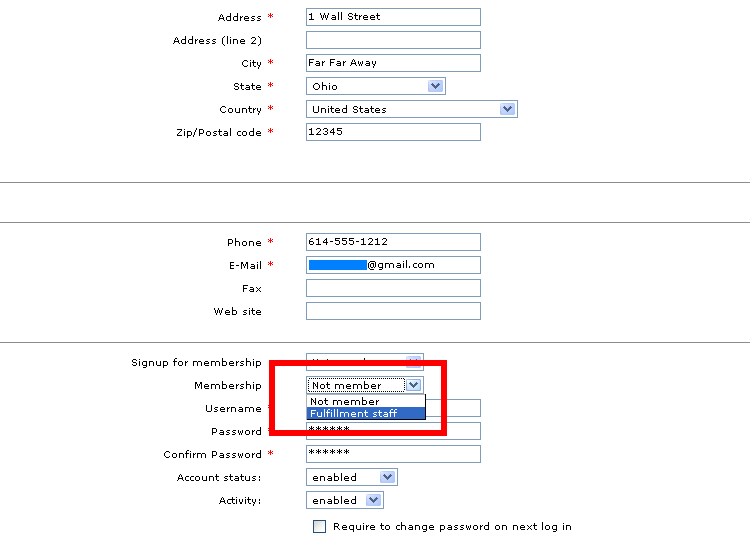
- Fill in the appropriate information for your employee. In the membership dropdown choose fulfillment staff and click submit
Congratulations! You now have a fulfillment staff member.
Step 2: Adding Linkable Pages
This is perhaps the easiest step in the process. You will notice since you installed the employee
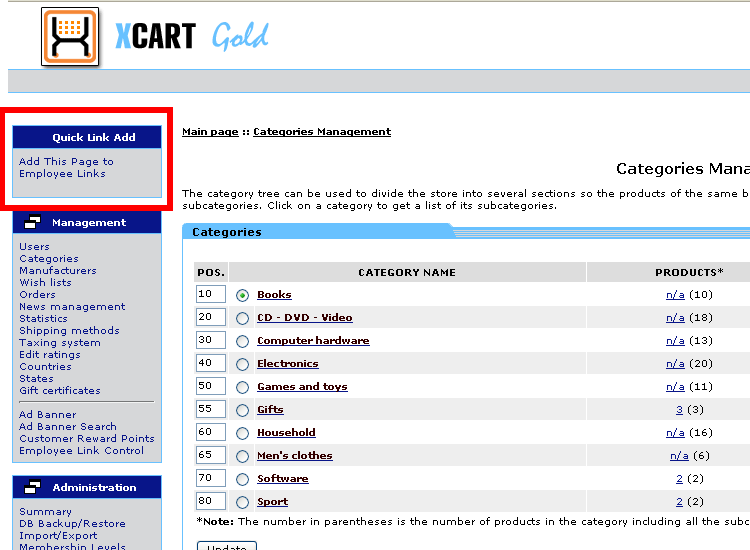
link control module that you have a box in the upper left that says Quick Link Add. In that box there
is a link that says “Add This Page to Employee links”. Whenever you are in an admin page that you may
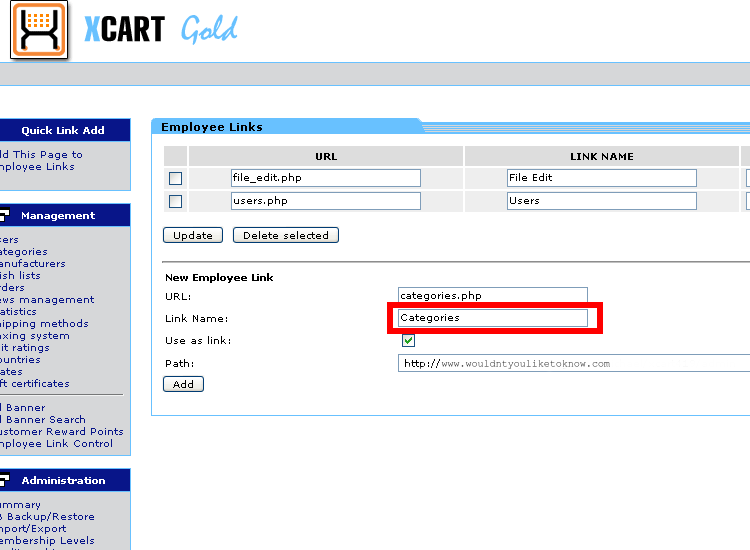
want to provide employee access to simply click this link. Doing this will open the add employee links
page with the majority of the add link information already in the text fields. The only field you will need
to enter is the “Link Name” for this you can put the whatever makes sense to you. Once this is done simply click
the “Add” button and you are done!
It should be noted this step does not provide any access to this page, it simply adds the current page to a list of pages that may have employee
access provided to them.
Example 1: Suppose you would like to give one of your employees access to the admin categories
page. Simply log in as an administrator navigate to the categories page and click “Add this page to Employee Links”
Step 3: Adding links to fulfillment staff
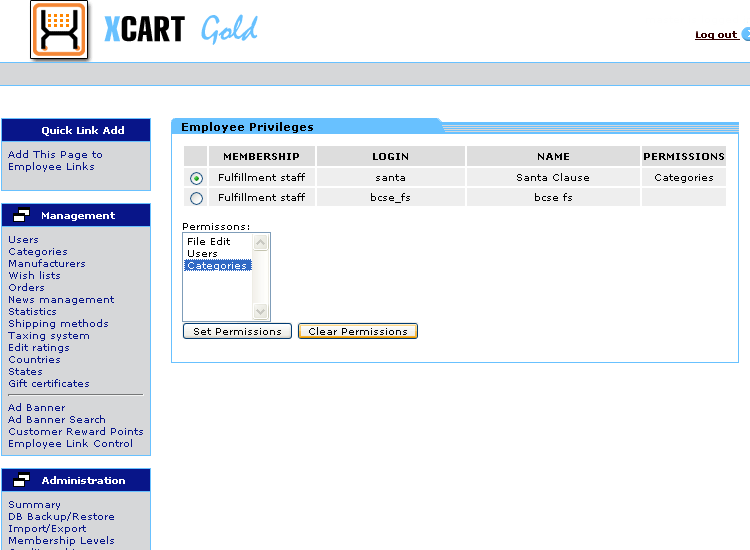
In this step you will give a specific fulfillment employee employee access to your newly created employee link.
- Log in as admin
- In the management menu click users
- In this section click Employee Priveleges
You should see a list of your fulfillment employees as well as a list of possible permissions.
- Select the employee whose permissions you wish to modify via the radio buttons on the left hand side.
- Granting Permissions
- Choose the permission you wish to add in the permissions menu, then click “set permissions”.
(If you followed the example you should see at least a “Categories” option)
You have now given your employee access to the selected admin link. The added permission should appear next to the employee in the permissions column.
- To grant multiple permissions to an employee at once you can control-click the permissions you wish to grant.
This will allow you to highlight multiple permissions before clicking the “Add permissions” button.
- Choose the permission you wish to add in the permissions menu, then click “set permissions”.
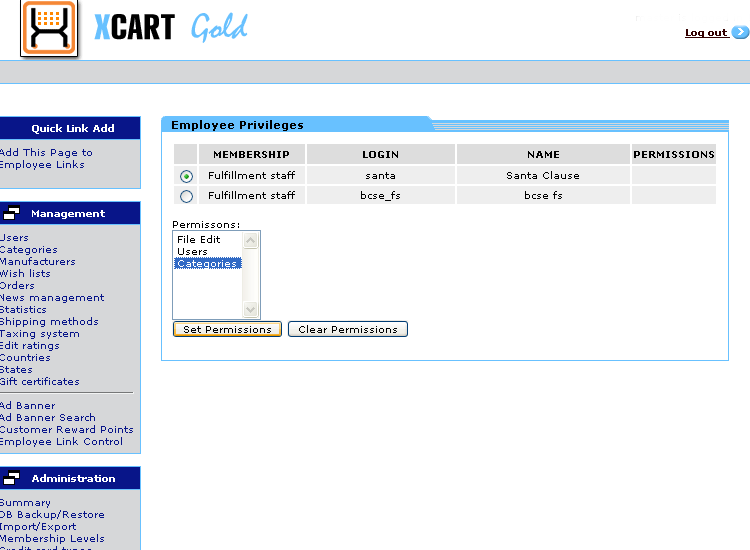
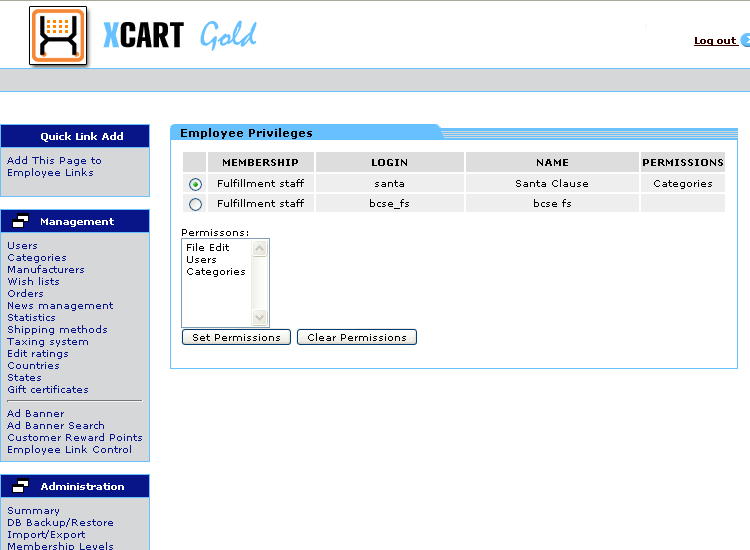
Your done! You can now log in as your fulfillment user and see what admin areas you now have access to.
Step 4: Removing privleges
In this step you will remove a specific fulfillment employees privleges.
- Log in as admin
- In the management menu click users
- In this section click Employee Permissions
You should see a list of your fulfillment employees as well as a list of possible permissions.
- Select the employee whose permissions you wish to modify via the radio buttons on the left hand side.
- Removing Permissions
- Choose the permission you wish to remove in the permissions menu, then click “clear permission”.
(If you followed the example you should see at least a “Categories” option)
You have now removed your employee access to the selected admin link. The removed permission should no longer appear next to the employee in the permissions column.
- To clear multiple permissions from an employee at once you can control-click the permissions you wish to remove.
This will allow you to highlight multiple permissions before clicking the “clear permissions” button.
- Choose the permission you wish to remove in the permissions menu, then click “clear permission”.
